
Setting up AWS
In order to get your own AWS S3 storage account working with Micrio, do the following:
In your S3 AWS console, create a new bucket by clicking Create bucket.
As a name, enter micrio (this is needed later on). For the region, select a region that is closest to your location, such as
eu-north-1.Uncheck the "Block all public access" option, and keep all options under it unchecked as well. This makes the bucket publicly readable for your website visitors.
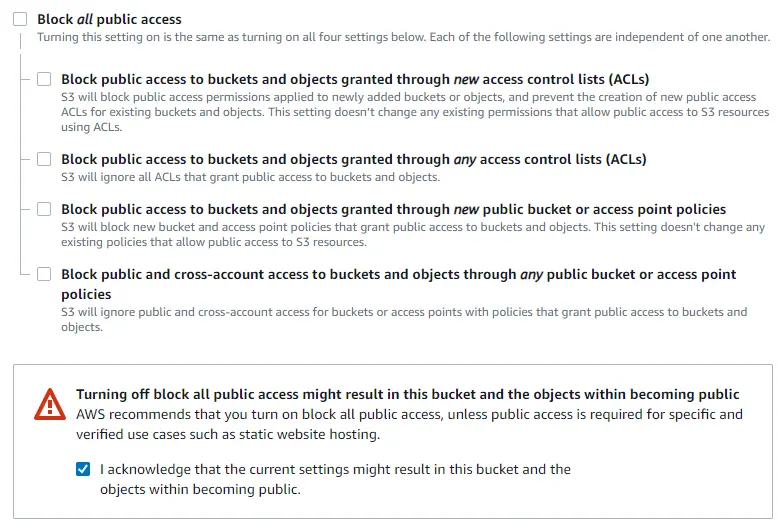
Check the acknowledgement that you understand this (because you do).
Keep Bucket Versioning disabled, add any optional tags (not required), and keep Default encryption disabled as well.
Click Create bucket.
In the next screen, you will see your newly created bucket. Open it by clicking it, then go to the Permissions tab.
In the Bucket Policy part, click Edit, and paste this JSON fragment:
json{ "Version": "2012-10-17", "Statement": [ { "Sid": "PublicReadGetObject", "Effect": "Allow", "Principal": "*", "Action": "s3:GetObject", "Resource": "arn:aws:s3:::micrio/*" } ] }This makes the bucket publicly readable by default. Click Save changes.
Next, scroll down to the Cross-origin resource sharing (CORS) part, and click Edit. Paste this JSON fragment:
json[ { "AllowedHeaders": [ "*" ], "AllowedMethods": [ "PUT", "GET" ], "AllowedOrigins": [ "*" ], "ExposeHeaders": [ "x-amz-server-side-encryption", "x-amz-request-id", "x-amz-id-2" ], "MaxAgeSeconds": 3000 } ]And click Save changes.
Next, let's create an Access Key that will be shared with Micrio, so it can have full control of this bucket.
Go to the IAM Dashboard , and click Add User. Name this user micrio, and select Programmatic access as type:
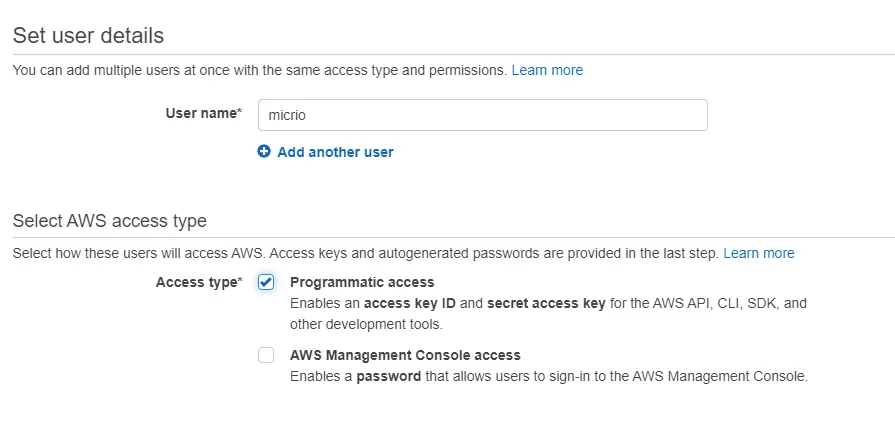
Click Next to Permissions, and leave this blank. Another Next to Tags, and you can fill in some optional tags here. Next, click Create user.
After the user is created, you see it in the list of users. Copy the Access key ID and Secret access key to a secure location, such as a key vault. You will need this later, and is important, because this is the only time you will see both keys without having to regenerate them.
Open the Users page again, and click your newly created user. Copy the User ARN for this user (looks like
arn:aws:iam::1234567890:user/micrio).Go back to the S3 Console. Open the Micrio bucket, and click Permissions. Scroll down to Bucket Policy, and click Edit.
In the JSON we've added earlier, add another JSON object to the Statement array:
json{ "Sid": "MicrioAccess", "Effect": "Allow", "Principal": { "AWS": "arn:aws:iam::1234567890:user/micrio" }, "Action": "s3:*", "Resource": [ "arn:aws:s3:::micrio", "arn:aws:s3:::micrio/*" ] }This grants the new Micrio user full read/write over the bucket.
Click Save changes. If something is not correct, it will give you feedback about it.
You're done! Next step is to contact us, so we can connect your S3 access keys to your Micrio organisation account. From there on, all Micrio uploads, data and assets will be stored there independently.
Optional: create a CloudFront CDN and put it in front of your bucket, to ensure global fast delivery of your imagery.