
Creating your own welcome screen Client 5.x
This page is about the Micrio client version 5. Use the links below to navigate to alternative versions.
An often used feature by stand-alone Micrio projects is a custom welcome screen, welcoming the users by either a video, image, some text, and possibly a choice for the user to start a tour, or just explore the project by themselves.
Before Micrio 5, this was not a default Micrio feature, and you had to create your own JavaScript/HTML layer to display this, and interact with Micrio.
However, you can now easily create your own Micrio-native start screen in the Micrio editor itself!
Creating the popup itself
In the editor, go to "Content" -> "Pages", and create a new Page.
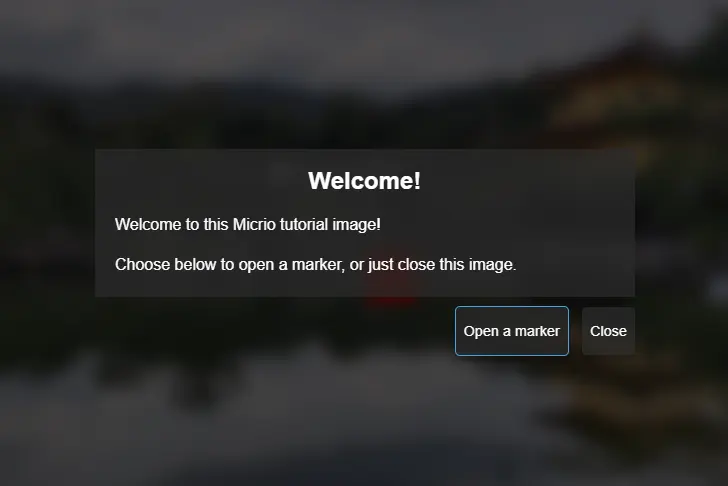
The page itself is a simple popup with just a title, some text, and a close button.
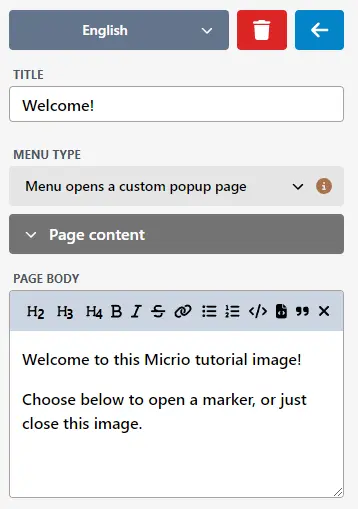
If this is enough, you can already save the page using the ✓ Save button on the top right.
TIP
For an explanation of all the options, visit this documentation page.
Optionally, if you want to add custom buttons, like to open our earlier created Red Marker, use the "Custom buttons" section to add them.
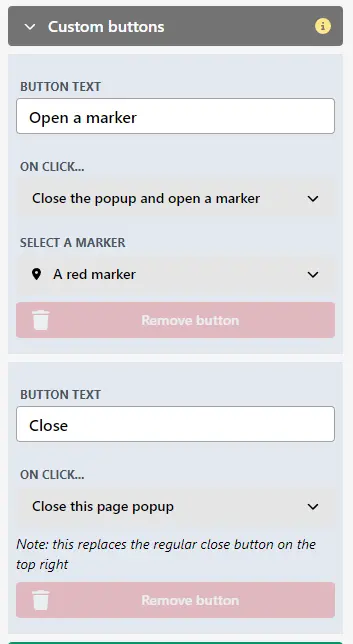
You can create as many buttons as you want per popup.
Displaying the page popup when the image is opened
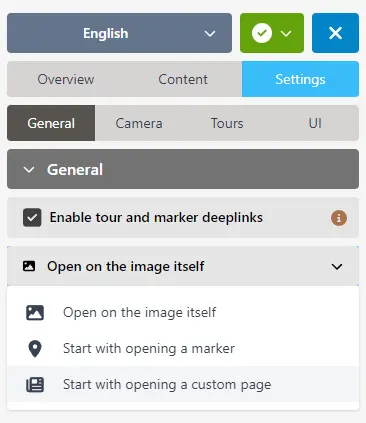
Go to the main "Settings" tab
Instead of "Open on the image itself", select "Start with opening a custom page", and then select the page you have just created!
TIP
Only already available content can be chosen here. You can also choose to start the image with a marker, or marker tour directly, however you first need to create them.
Viewing the image with its welcome popup
If you have completed the previous steps, and you have published your image from the dashboard, your embedded Micrio image will open with the welcome popup you have just created!
Conclusion
In this tutorial, you have learned to create your own customized welcome popup, including with several action buttons the user can choose to start your interactive experience.
The full working HTML of this tutorial can be found HERE.
If you have any more questions, please drop us a line and we'll try to help you further!