
Marker tours
Marker tours are a way to guide your visitors through your images, following a predefined path of already-made markers.
This allows you to guide your visitor's story on a structured way.
Creating a marker tour
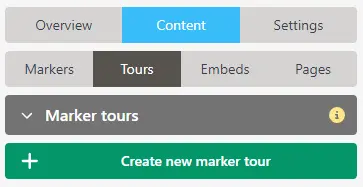
Under the "Content" -> "Tours" tab, click the "Create new marker tour" button.
Adding your markers to a tour
A marker tour is a sequence of markets. Once you've created or selected a marker tour, you see all image markers semi-transparent.

Click on the markers you want inside the tour, and you will see that they will be circled blue, and have a number inside them.
Reorganising your tour-steps
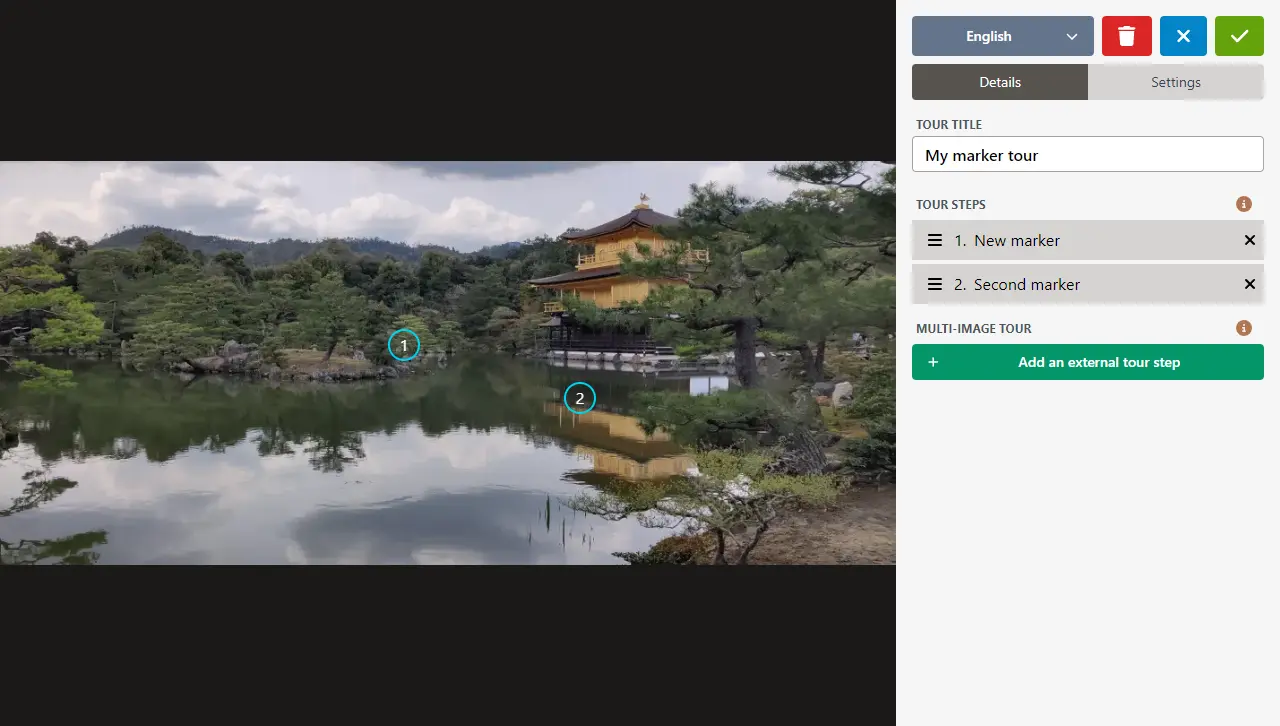
The numbers indicate which step inside the marker tour the markers are. You can change the order of the steps by dragging tour step blocks in the side pabel.
If you want to remove a marker from the tour, simply click on the in-image marker element again, and it will be removed. Alternatively, you can use the "X"-button on the side of the marker block in the side bar.
Adding tour steps from other images
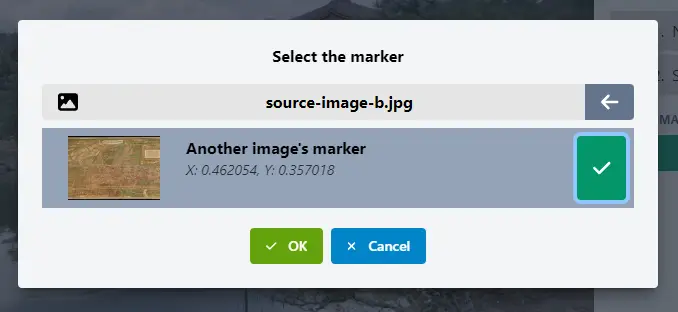
Using the Add an external tour step button in the side bar, you can select a marker from another Micrio image. By doing this, for this tour step, the image will first switch to the other selected image, and open the selected marker there. If the user continues to the next step, the main image will be reopened.
This is a very powerful feature, which allows you to create tours over many different images!
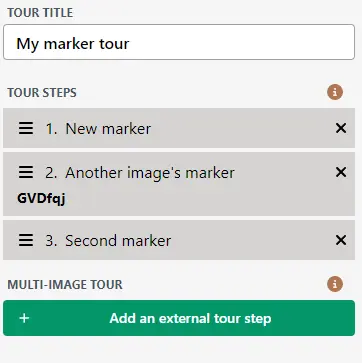
External tour steps will be displayed with the other image ID below the title.
Marker tour settings
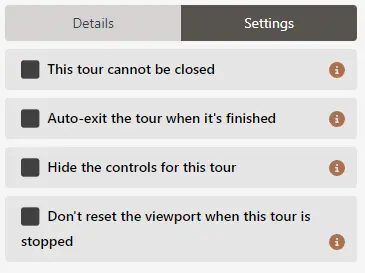
In the sidebar, you can customize the tour behavior by going to the Settings tab at the top.
- This tour cannot be closed: When this tour is started, the user will not be able to exit this tour. This works well if you have also set this tour to auto play when this image is opened (see Image Settings)
- Auto-exit the tour when it's finished: When individual tour steps have playable media (audio, video, or an embedded video tour), this tour will automatically proceed to the next step, or if it's the last step, exit the tour when the individual marker's media is done playing.
- Hide the controls for this tour: The user will not be shown the tour controls. Use this when you want to auto-forward the tour when there is media playing, or if you are using a custom JavaScript implementation that is controlled externally.
- Don't reset the viewport when this tour is stopped: By default, closing a tour resets the camera viewport to how it was when the tour was started. Turning this option on disables that.