Video tours
Video Tours are a main Micrio feature. They allow you to create a totally self playing tour through your image, using multiple viewports set out over a custom time line, with additional main audio like a voice-over.
Creating a video tour
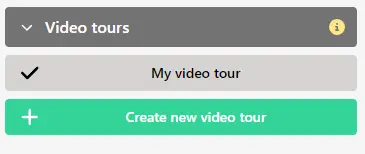
Under the "Content" -> "Tours" tab, click the "Create new marker tour" button.
Setting the tour duration and adding audio
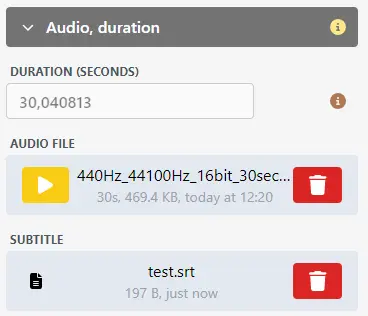
The first thing you'll want to do after creating a new video tour, is decide the total duration of the tour. Perhaps you already have a voice-over audio file of 2 minutes, then you should set the duration to 120 (seconds).
Audio, subtitles
The unique part of a Video Tour is that you can add a single piece of audio that will be played when the tour is running. A single, long voice-over that tells you about what you see during the touring progress is perfect for this.
You can do this by clicking "Add an audio fragment"
Once you have uploaded and selected the audio fragment, you can also upload an accompanying subtitles file (SRT format), which will be displayed when playing the tour.
Video hotspots

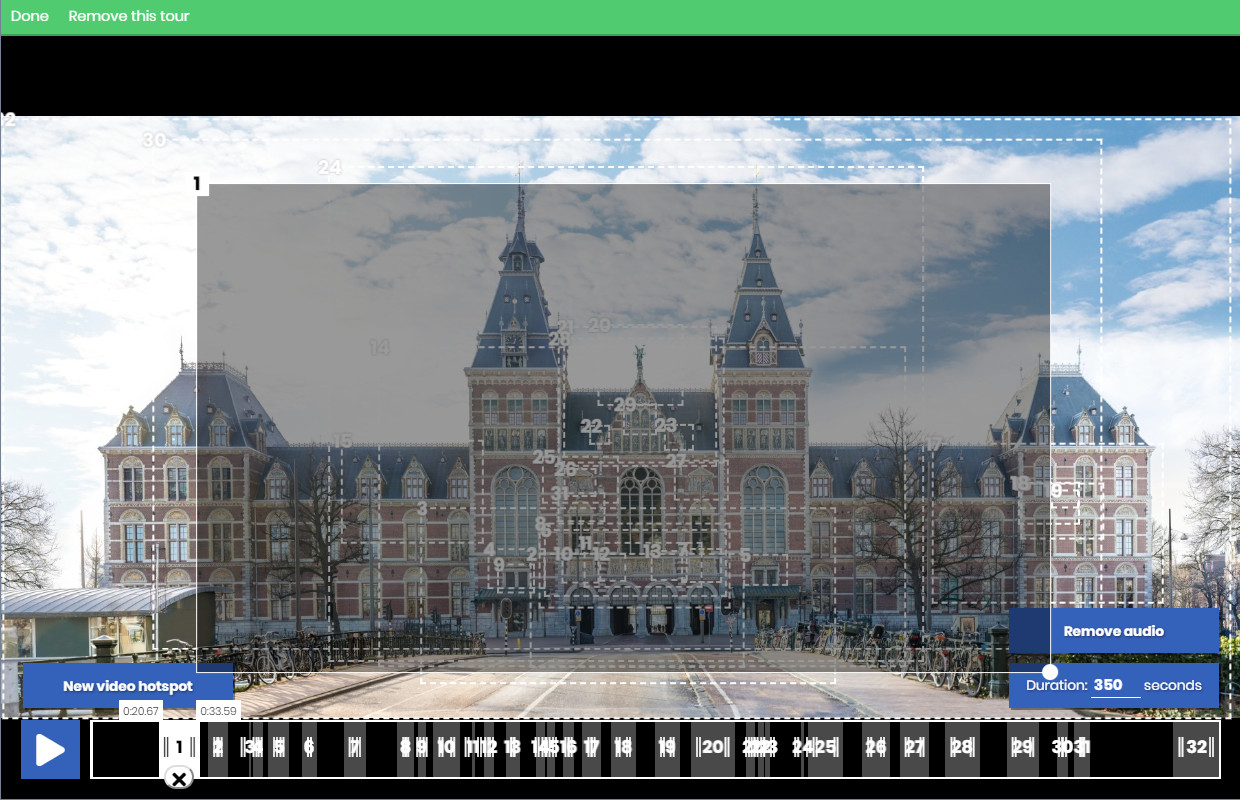
The most important part of the video tours are the video hotspots. These are the views the camera will focus on during the tour.
To create a hotspot, click on the + button in the bottom right of your the image. This will create a new view rectangle in your image, which you can then freely place and resize. During the creation process, you can freely zoom and navigate through the image, allowing you to precisely set the viewport to your needs.
The timeline bar

The timeline bar is the bar at the bottom of the editor interface. With this, you can set the tour viewport order, and camera timings.
After creating a video hotspot, you will see a new gray block appearing in the time bar. This is the period when the camera has this view focussed, ie doesn't move.
You can adjust the position of the view area by dragging it through the timeline, and you can adjust its duration by dragging the left and right handles of the grey block.
TIP
If you set a segment to the total beginning of the time line, when a user starts the tour, the viewport will immediately switch to it. If you want to add a smooth animation to it, move the segment to start a bit later, and the camera view will ease to it based on the timing.
Previewing
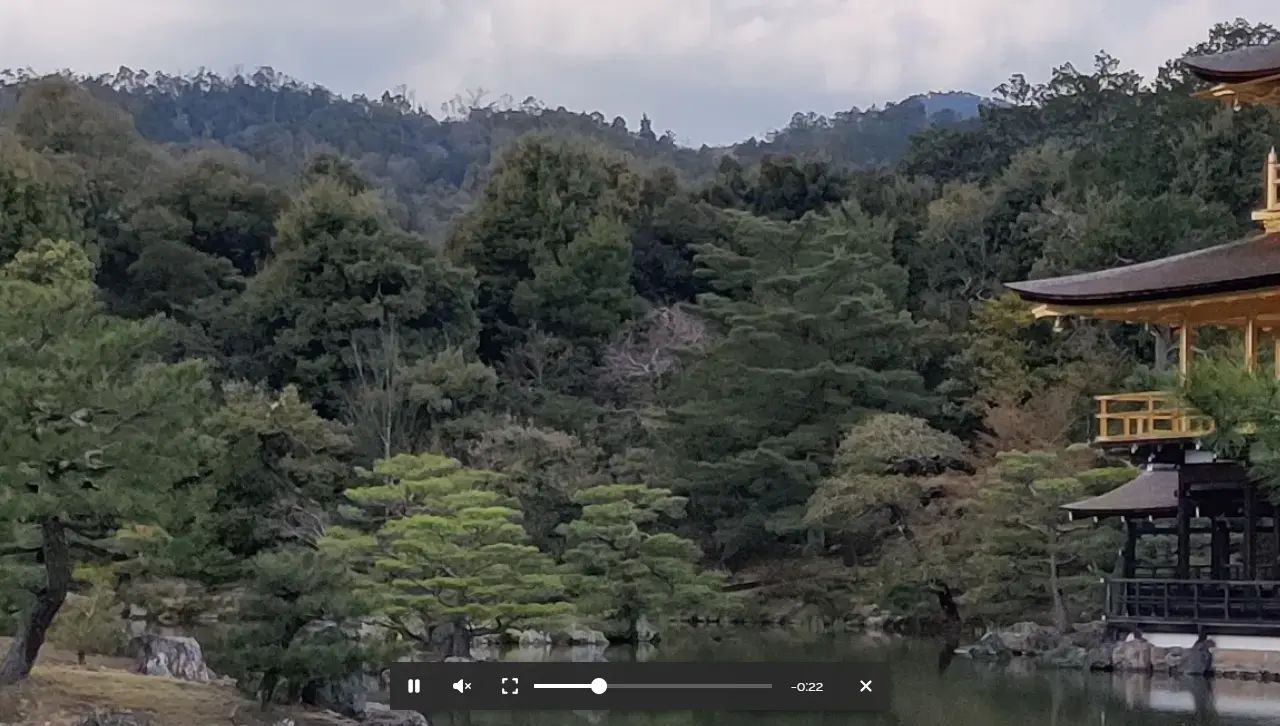
You can always click the "play" button to preview the tour with its current camera viewport configuration, and the connected audio file.
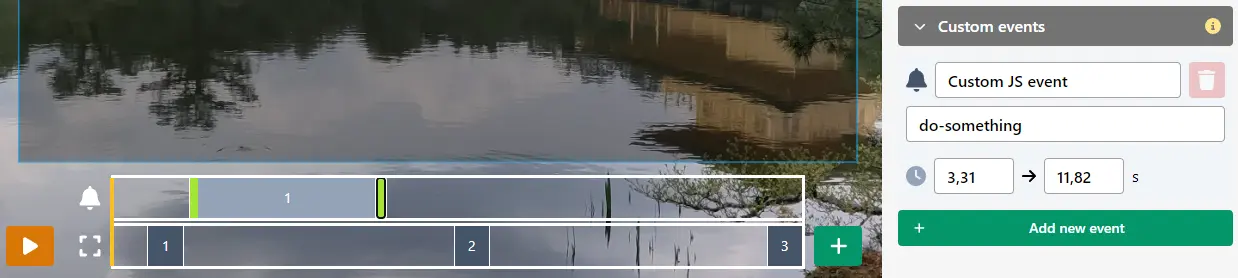
Custom tour events
If you work with a custom Micrio implementation in your website, and want to fire specific events while playing this tour (so you can hook certain functionality to the tour being played), you can use the Custom events section.
TIP
If you don't know what this is, or what to use it for, you won't need this function.
Creating a custom event
Events work just like viewports in the timeline. If you click "Add a new event", a second time bar will be displayed above the viewport timebar. There, you can create multiple events, and time them in the same manner as the viewports.
Be sure to enter at least a name for the event ("Event action"), and a possible arbitrary value. For instance, change-color as Event Action, and blue as Custom Data.
Reading the tour events in the Micrio client
When a video tour has custom events, you can use the Micrio Events API to read them. The events to listen to is tour-event (API documentation).
This event fires twice: when the Custom Event starts being active, and when it stops being active. You can read the current state by looking at the .active property of the event.
Example, using our change-color event:
YourHTMLMicrioEvent.addEventListener('tour-event', (e:CustomEvent<Micrio.Models.ImageData.Event>) => {
	// The JSON of the custom event
	const tourEvent = e.detail;

	if(tourEvent.action == 'change-color') {

		// Change the page background color
		if(tourEvent.active) { // The event is currently active
			// This is 'blue' in our example
			document.body.style.backgroundColor = tourEvent.data;
		}
		else { // The event has ended
			// Reset the background color
			document.body.style.backgroundColor = '';
		}

	}
});
Example application
A great example of this (in Dutch) is a tour through the outside architecture of the Rijksmuseum Amsterdam, as made by NTR Schooltv: An interactive video tour of the Rijksmuseum . Click "Start Details" when you've opened it to see a wonderful application.