
360° object marker positioning 360° objects only
TIP
This setting is only visible when the current opened object is a 360° object
The placement of markers on a 360° object bears a little complexity, since this is a simple marker placed on a pseudo-3D environment.
Markers in 360° objects have a little different placement controls, which are explained on this page.
FIRST THINGS FIRST
Before you place your first marker, make sure that you have set the 360° camera settings to match the original photography setup, so the markers will rotate correctly with the object's 3D space!
Placement
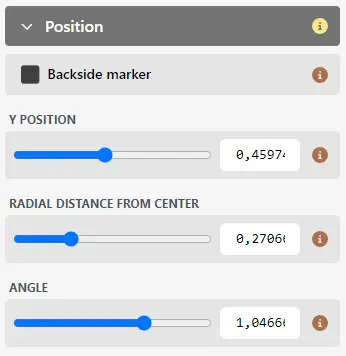
In the Placement panel, instead of just setting the 2-dimensional X and Y coordinates of the marker, you can set several other variables.
Each of the settings are realtime, so you can immediately see the effect in the Micrio display, to make fine-tuning and tweaking as easy as possible for you.
Backside marker: In some special cases, you want to place a marker inside an object, (ie. a clay pot). That means, that the marker should be rotating at an inverse for when it's placed on the outer surface of the object.
This is only used in special cases, and using this option we recommend tweaking with the below options to make sure it sits on the object correctly.
Y Position: Specify the vertical position of the marker, based on the object's center (set in the 360° camera settings). Without taking perspective into account, specify here at what vertical position the marker should be located.
Radial distance from center: How far the marker is distanced from the object center.
Angle: The angle around the vertical axis of the object, which would put this marker into the center of the screen.
While this sounds complicated, the best way to set this is to:
- Rotate the 360° object so that the center of the screen would be the location of the marker
- Adjust the "Angle" slider of this marker to go to exactly the center of the screen.
It's generally adviced to play around with this setting a lot, since in some cases it might be confusing. Move the marker, and then rotate the object to its sides, and zoom in and out, to see if the placement is correct. Rinse and repeat until the position seems fitting.
WARNING
If rotating the object seems to shift, or displace the marker based on the position that you put it at, it's possible that the 360° camera settings needs adjusting!
Visibility arc
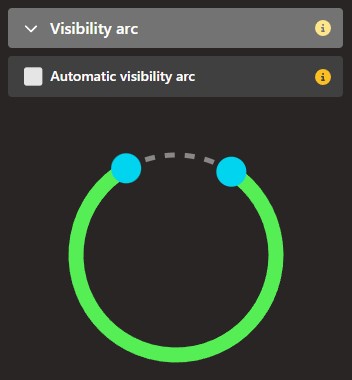
By default, a 360° object's marker should of course only be shown if it's not behind the object at the angle you are currently viewing.
Using the Visibility Arc settings, you are able to fine-tune the arc (in radians) from when to when the marker will be visible.
Automatic visibility arc: if this selected, Micrio will use the default setting of showing markers when they are rotated between -90° and 90° from the current center viewing angle. If your object is a perfect vertical cylinder, this would work perfectly.
Visibile arc start / end: If you are not using the automatic visibility arc, here you can specify (in radians) the angle where the marker will be visible, coming in from the sides of the object:
- Arc start: the marker comes in from the right side of the object
- Arc end: the marker leaves sight from the left side of the object
Settings improvement
We realise that while these settings work, they are not very intuitive to use. If you are reading this: we plan on improving these settings to be more user-friendly, and also show a visible feedback of the selected visibility arc.